CubeBullet The Bottom.


  • Well, here we go. We are almost there. A word of warning, some of the instruction sets below are long. Pay very close attention to what you are doing during these sets. If you get lost, you may have to start over from the beginning. The very beginning. All the way back. Get my point? Good. Onward.
  • There is a very slight chance that your cube may actually be done right now. If it is, I can't imagine why you would be reading this. Since you are reading this I will assume that you still have some unfinished business.
  • Remember how we were only concerned with whether the corner cubes were in their correct spots at first? Well that is exactly the same thing we need to look at now with the bottom edge cubes. You have three possibilities to check for.
  • If none of the bottom edge cubes are in the correct spots then click here
  • If one of the bottom edge cubes is in the correct spot then click here
  • If all four of the bottom edge cubes are in the correct spots then click here

  • None of them were correct.

  • Since none of the bottom edge cubes were in the correct place, it will not matter which color you choose as your face color, as long as your bottom color is on the bottom. Pick a face and perform the following set of instructions.
  • There should now be one bottom edge cube positioned correctly. You are ready for the next step.

  • One of them is correct.

  • Position your cube so that the one correct bottom edge cube is the same position as the checkerboard cube in the picture.
  • Rotate your cube so that your front face (the red face on my cube) is facing you and perform the following set of instructions.
  • Check your bottom edge cubes. If you still have only one bottom edge cube in the correct place go back to the instructions above and follow them back to this line. At that point you should have all of them in the correct spots.
  • If they are all in their correct spots already then click here.
  • They are all in their correct spots.

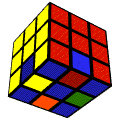
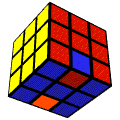
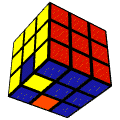
  • This is it! The last set of directions! Is it starting to look the way it did when you bought it? Great! Check the bottom of your cube. There are three patterns that can occur. They should look like these.

  • If your pattern matches picture #1 (checkerboard), click here.
    If your pattern matches picture #2 (letter H),click here.
    If your pattern matches picture #3 (diagonal), click here.


    It looks like a checkerboard.

  • Pick any color as your face (make sure you bottom color is on the bottom) and perform the following set of instructions.
  • If you didn't get lost during that, then you are done with your cube! Cool huh?!? Please take the time to read the next part.

  • It looks like the letter H.

  • Hold your cube so that your incorrect cubes match the positions of the incorrect cubes in the picture.
  • Turn your cube so that our face color (the red face on my cube) is facing you. As far as I can tell, this is the longest set of instructions for the Cube. Keep your head, and take it easy, and you should have no problem. Ready? Please follow this set of instructions.
  • If you didn't get lost during that, then you are done with your cube! Cool huh?!? Please take the time to read the next part.

  • It look like a diagonal.

  • This set of instructions will come in two parts, so don't be worried if it is not done when you are finished with this next set of instructions. Hold your cube so that it matches the pattern in the picture.
  • Rotate your cube toward you 90 degrees like you have in the past steps. Now perform this set of instructions.
  • Their should now be one bottom cube in the correct position. Look at your bottom face. Position the correct edge cube so that it is on the top edge of your bottom face. Rotate your cube 90 degrees like you have in past steps and perform the following set of instructions.
  • If you didn't get lost during that, then you are done with your cube! Cool huh?!? Please take the time to read the next part.

  • You did it!!!

    Congrats! I have really enjoyed writing this page. . The hard part was remembering the how the damn Thing was solved. I had to twist up my cube (A "real" Rubik's Cube) a whole bunch to remember how the steps went.

    leftarrow

    Comments or Complaints to:mailto:[email protected]


    Return to top of Page